There are various ways to apply smokey eye make-up depending on your eye shape or how dramatic you want the finished look to be. It’s one of the most popular make-up looks and can sometimes be one of the trickier to master as the dark coloured eyeshadows will enhance any flaws in your application or blending. So here is a step by step tutorial to help guide you on creating classic smokey eyes.

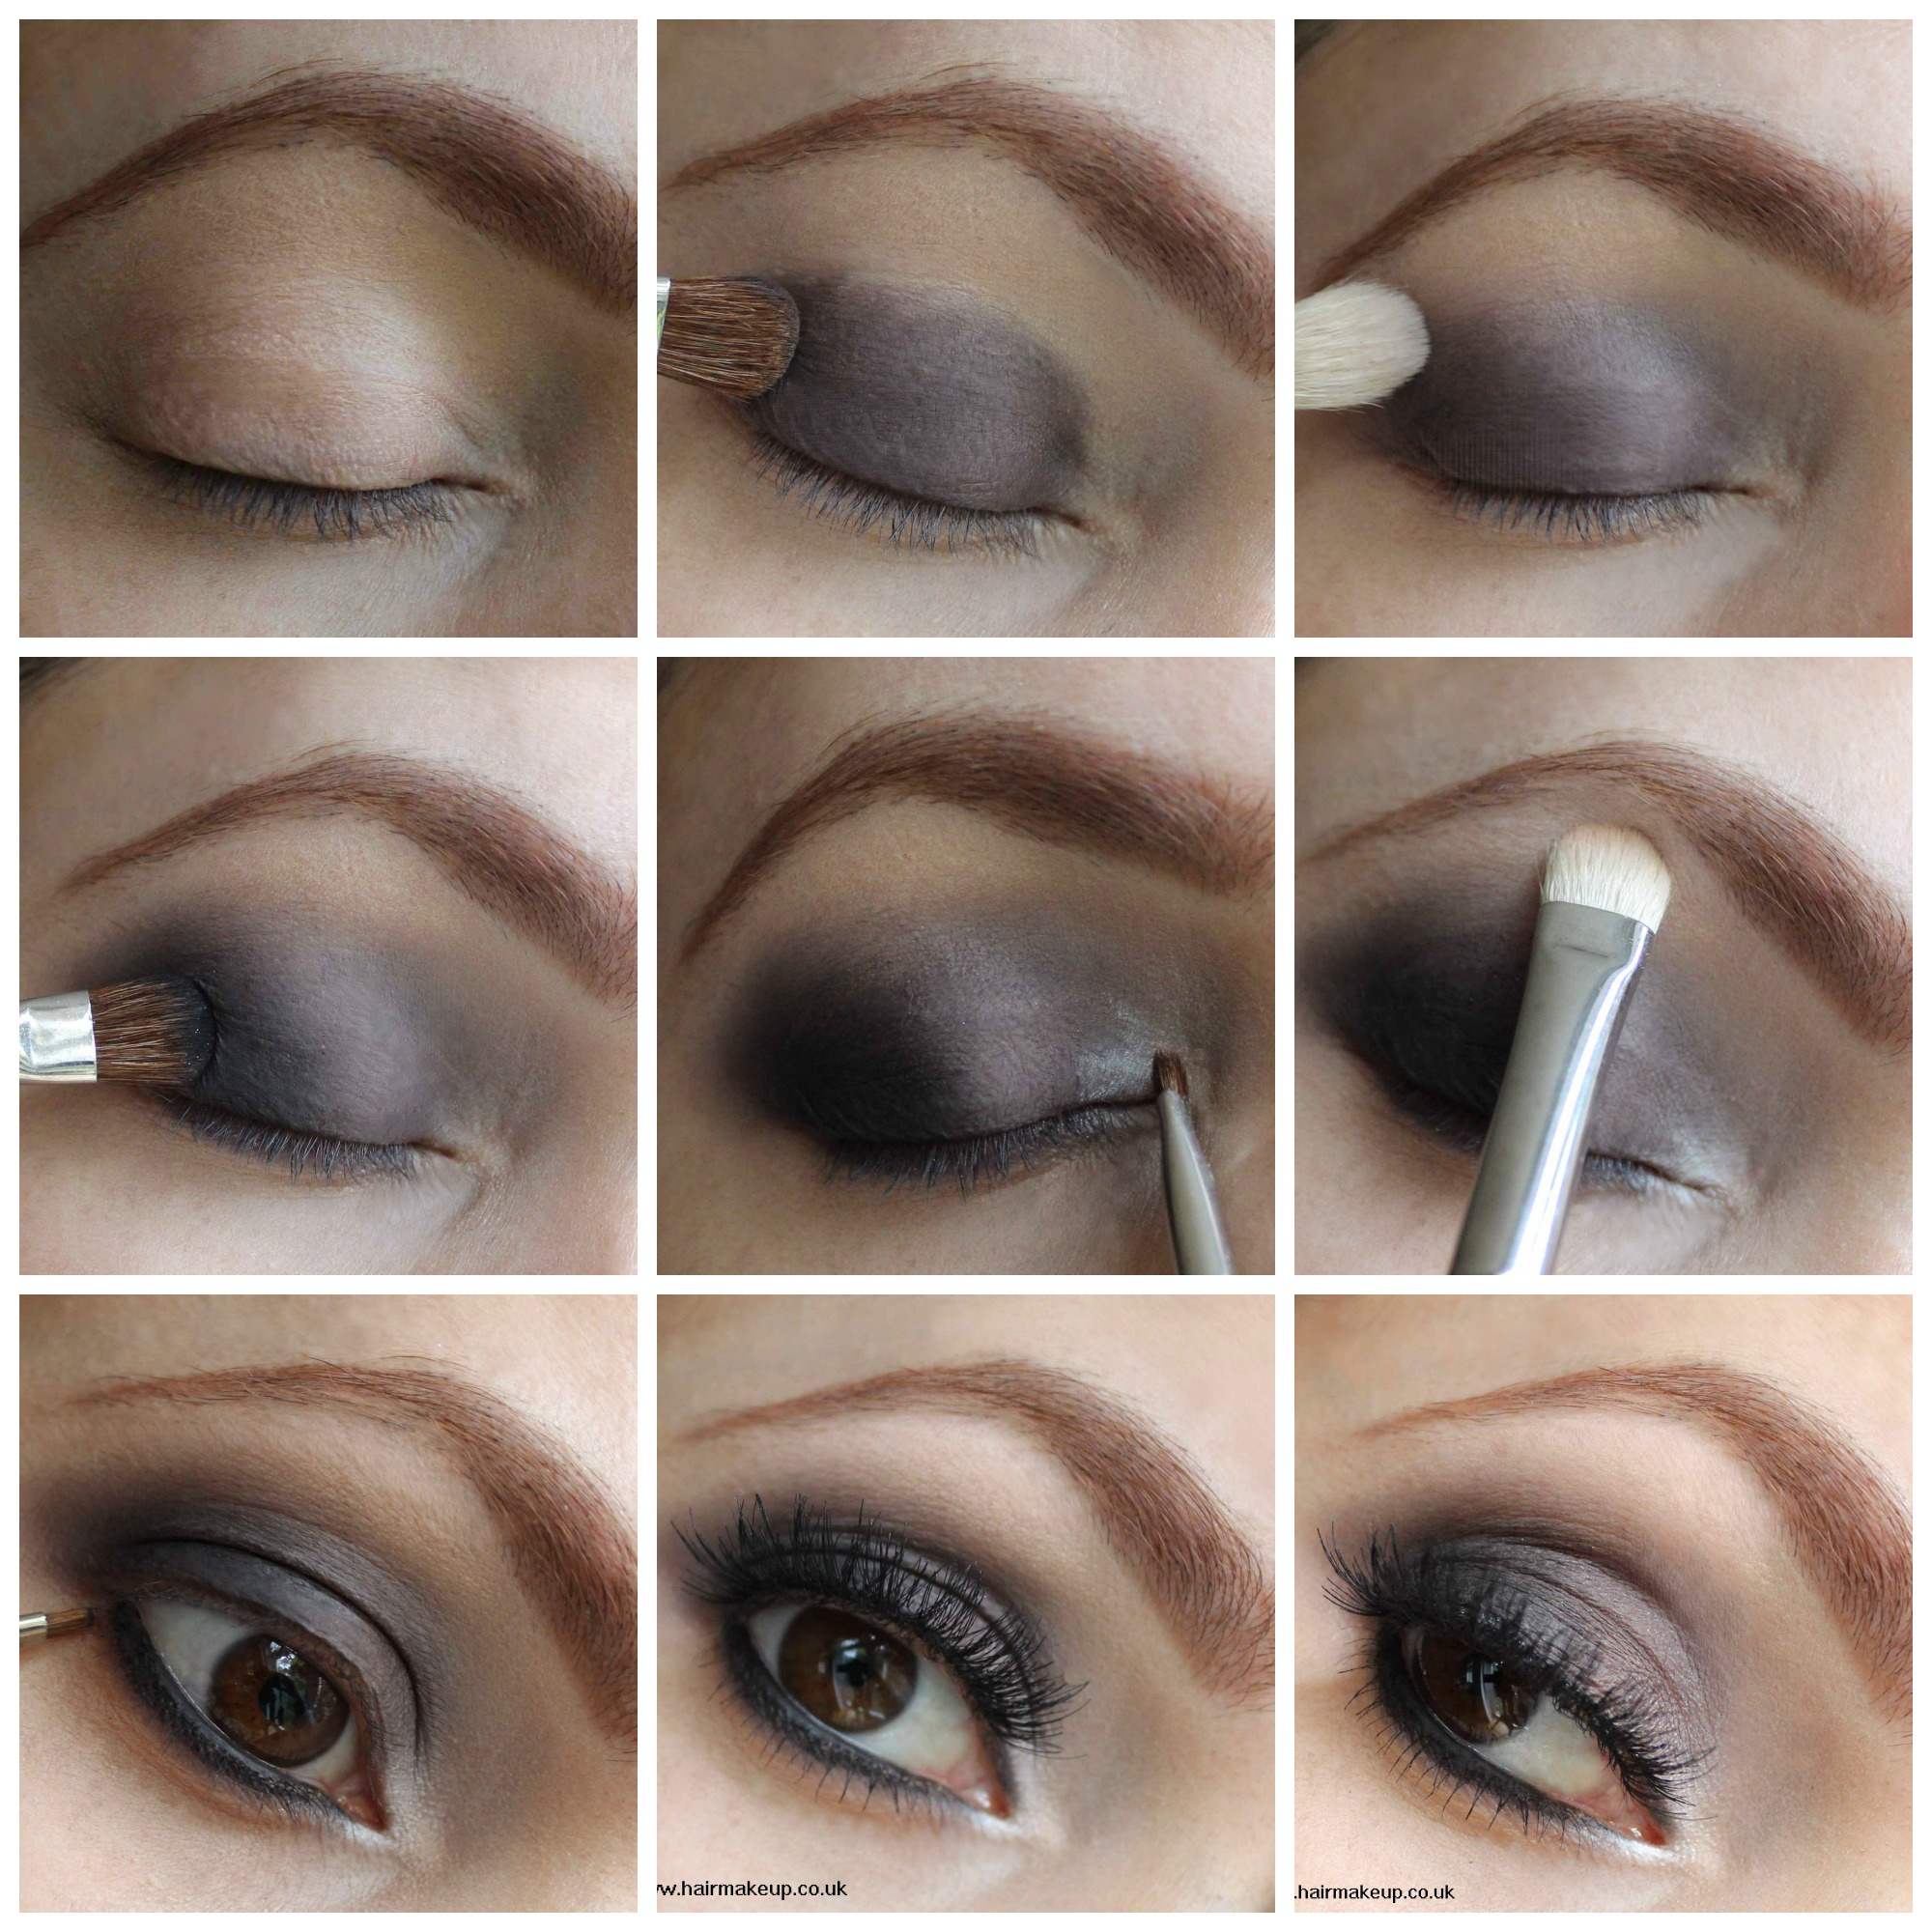
Start by preparing your eyelid with either an eye primer or a layer of concealer on the entire eyelid and brow bone, finish with a layer of powder so the lid is not moist and ready for your eyeshadows.

Apply a dark grey eyeshadow to the lid area leaving a little gap on the inner corners (this is where we are going to add a highlighter), place the grey into the socket line but not too high as we need to leave space for blending, stretch the colour out at a little on the outer edge too as this helps to uplift the eyes. If your eyeshadow isn’t giving you enough intensity with the colour then pat and press it on for a heavier more dense coverage. Apply the same eyeshadow under the eyes too.

Now blend the edge of your eyeshadow with a soft fluff brush in small circular back and forth movements, just work over the edges as we are only softening the lines so there are no hard edges and don’t want to start dragging the make-up too far from where it’s been placed. Don’t use this brush over the lid area or you will start to remove the grey eyeshadow and the look will be less intense.

Now intensify the smokeyness by pressing on a black eyeshadow in the outer half of the eyelid blending it a little into the socket line, slowly work your way up as this is where you can make mistakes and create patches – black is very unforgiving. It’s easier to slowly build up the colour than do too much and try to take it away. Keep pressing and softly blending the edges till you have reached the strength you are happy with. Don’t be put off by the way the make-up looks at this stage, keep going because it doesn’t always look good until you have finished the full look. I used a black eyeshadow with silver glitter in for this look, some of these black eyeshadows with coloured glitters can highlight the dark smokey eyes without loosing the depth of colour.

Now highlight the inner corners with a white or light coloured eyeshadow using a small brush, highlighting the eyes creates a little contrast against the black which can make it look sharper and make the eyes appear bigger.

Highlight the entire brow bone with a pale coloured eyeshadow softly blending down into the grey edge of the blended socket line.

Using either a black kohl pencil, liquid eyeliner or both, line the top and bottom of the eyes, use a small brush to blend the edges into the grey eyeshadow for a more blended look.

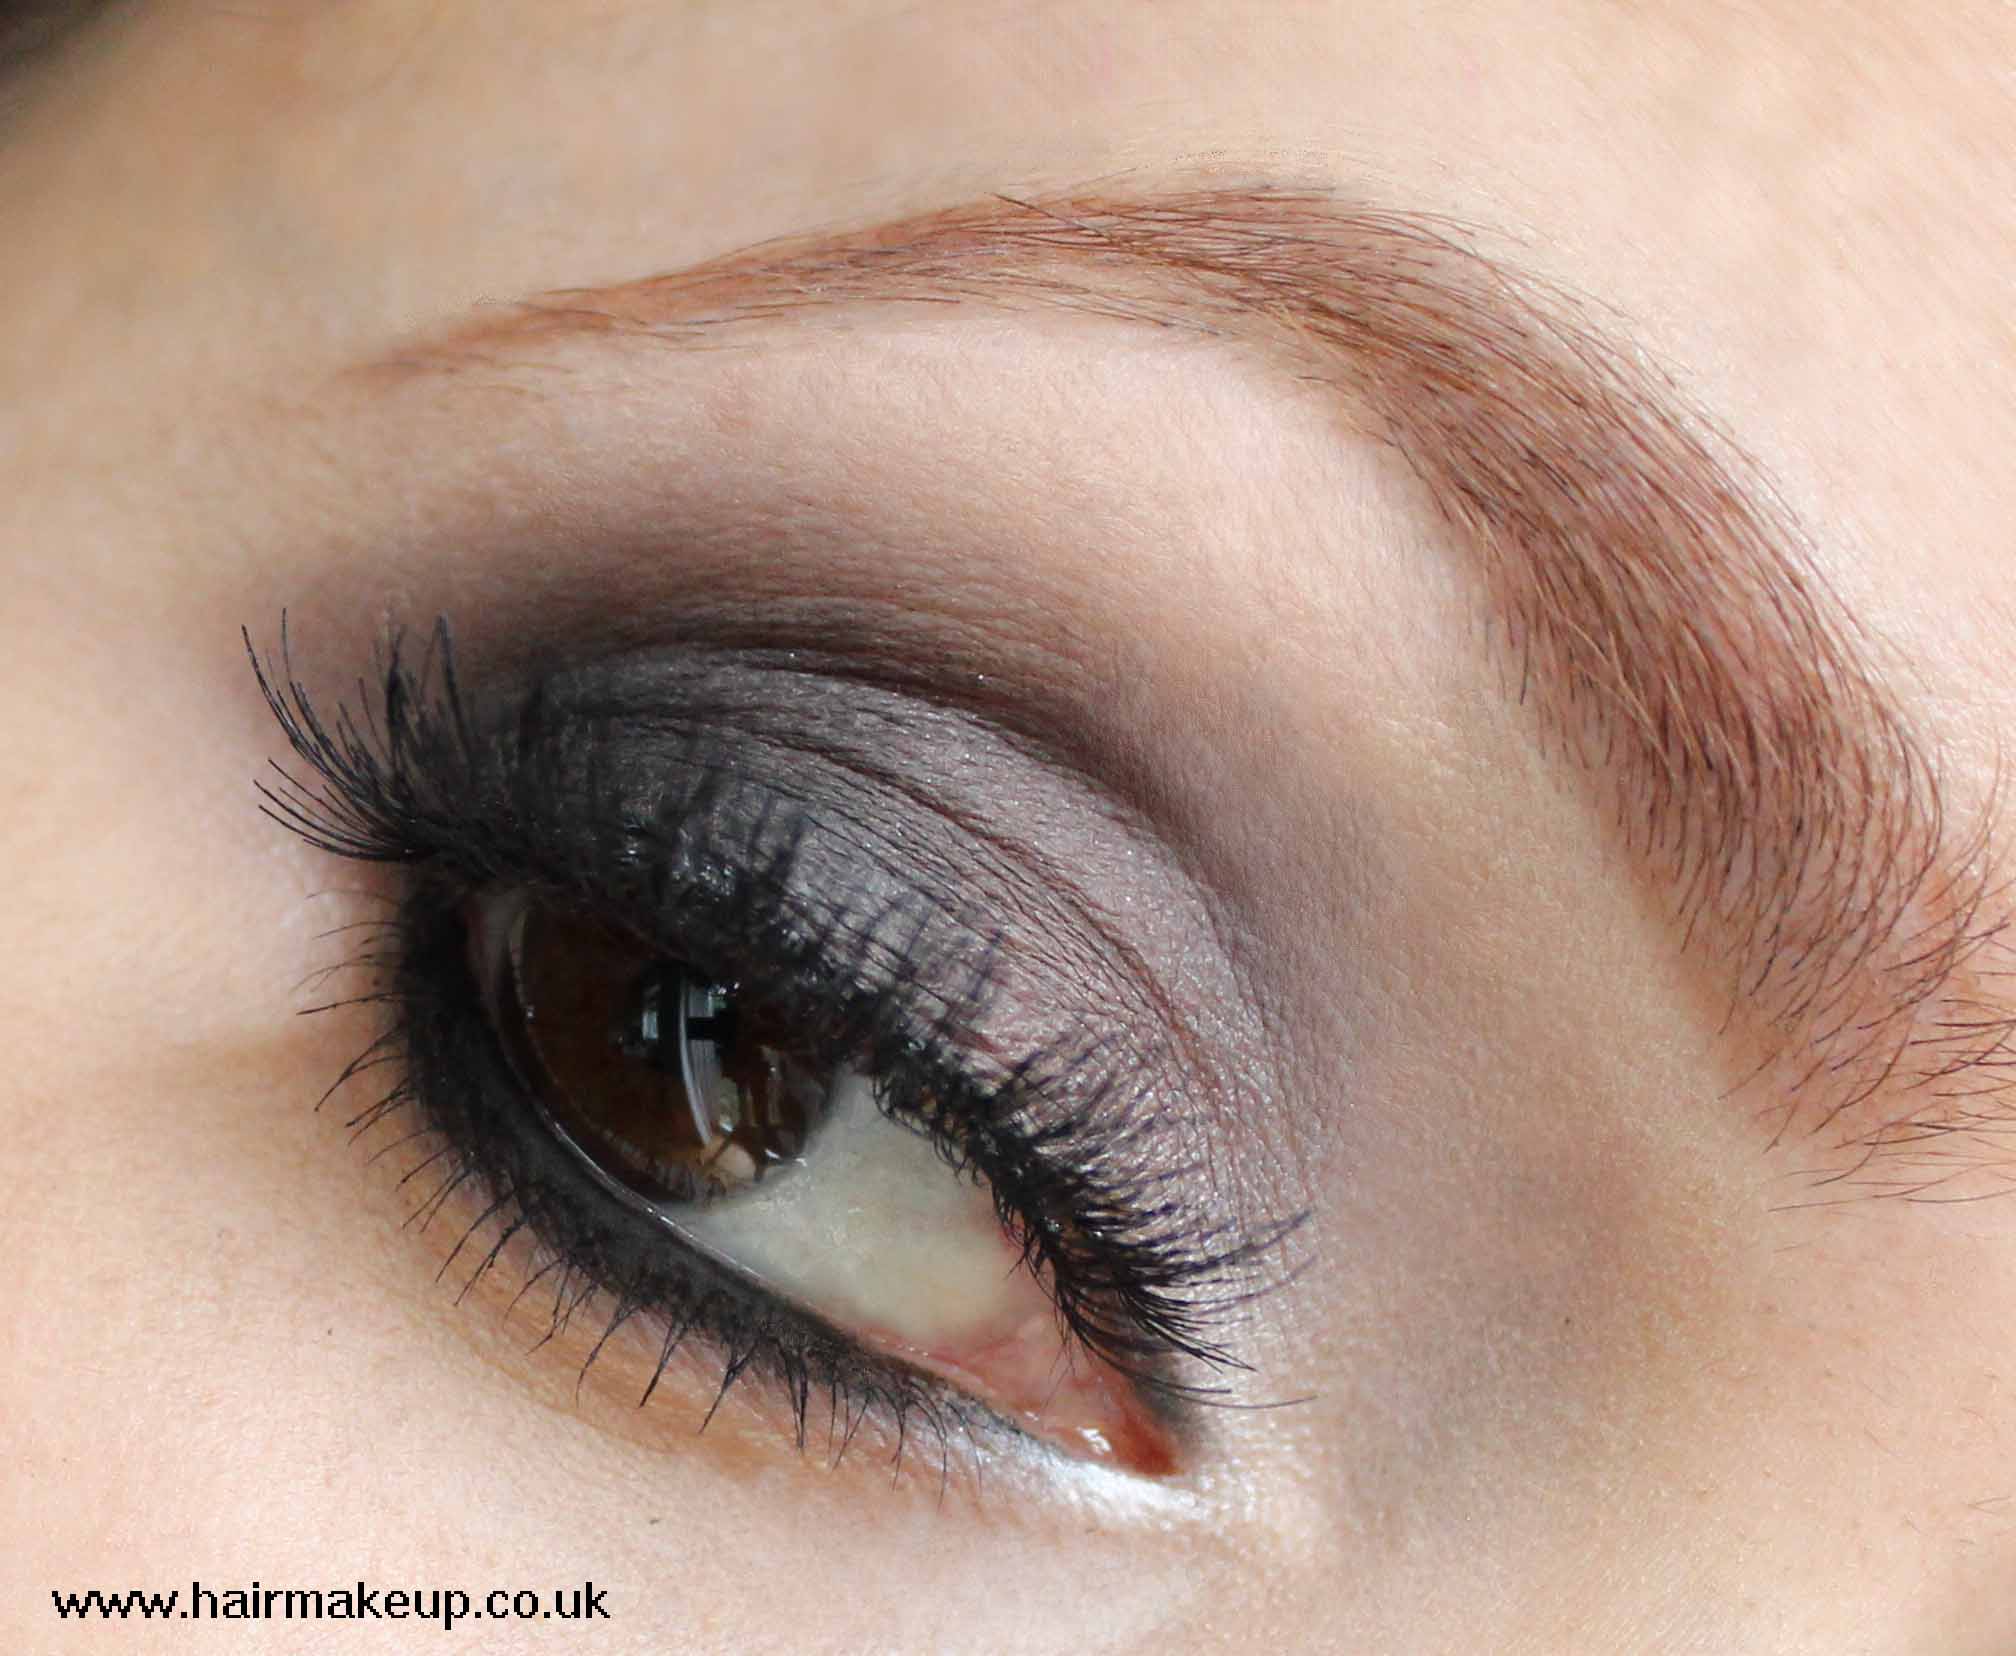
Finish the smokey eyes by applying mascara and false lashes for a more dramatic look.
You can see a few more examples of different styles of smokey eyes here, and eye make-up ideas here, or for my full portfolio click here. One to one lessons can also be arranged in northwest London if you would like to learn how to apply eye make-up for special occasions, click here for more info or contact me for more details.